The TPLS Management Module
The TPLS is a test that evaluates an individual's proficiency in oral and written comprehension of a second language. The platform includes four modules:
- Administration: For CCDMD personnel to configure and administer the test. The administrator can also access a subscriber's Management module and provide assistance if required.
- Management: Where subscribers manage their individual accounts
- Editing: Used to create and modify the content of the proficiency test
- Test: The actual test module where respondents answer the questions
Logging In
The person responsible for the TPLS at the CCDMD communicated your username and password to you by either email or telephone.
To login to the TPLS Management module:
- For the English test, open a browser connected to the Internet and go to the following address: http://www.tpls.ca/management For the French test, open a browser connected to the Internet and go to the following address: http://www.tpls.ca/gestion
- The Management module Login page appears.
- Type the username or registered email address in the Username or email field.
- Type the password in the Password field.
NOTE: If you enter the username or password incorrectly, a message appears that the information is invalid. Re-enter the username and password to try again. If you have forgotten your username or password, click Lost username or password? and follow the instructions. - Click Login. The Management module opens to the Groups page by default. The main menu on the left displays the other options. If you need help, click on Help in the page header.
Change my Password
You can change the password for your account through your manager profile.
To change your password:
- When logged into the SLPT platform, place your cursor over your name in the page header.
- Select Subscription from the drop-down list. The User page appears.
- Scroll to the Manager Profile section.
- Type the new password in the Password field.
NOTE: Passwords are case-sensitive, must be at least 8 characters long, and contain at least one letter and one number. - Re-type the new password in the Confirm the password field.
- Click Save.
The new password takes effect on your next login.
Change the Display Language
You can change the display language for the SLPT interface. The default language is defined in your manager profile. You can change the interface language for a single session, or change the language preference in your manager profile. The available language options are French or English.
To change the interface language for a single session:
- When logged into the SLPT platform, scroll to the bottom of a page.
- In the Language column, select the language you wish to use.
To change the language preference in your manager profile:
- When logged into the SLPT platform, place your cursor over your name in the page header.
- Select Subscription from the drop-down list. The Subscription page appears.
- Scroll to the Manager Profile section.
- Select the new default language from the Language drop-down list.
- Click Save.
Edit Subscription Information
You can edit your subscription settings through your user profile.
To change your subscription settings:
- When logged into the SLPT platform, place your cursor over your name in the page header.
- Select Subscription from the drop-down list. The Subscription page appears.
- Edit the desired account settings in the Manager Profile section.
- Edit the desired account settings in the Institution section. Note that only the CCDMD administrator can edit the Institution Name and Department.
- Click Save.
Using Online Help
- You can access the SLPT online help by clicking the Help link in the header of every SLPT page.
- The topics for the Management module help appear on the left side of the window. Click on a subject link to view the related help information.
- At the bottom of each help page are links to the previous and next pages; the link in the middle takes you back to the top of the page.
- You can print the current help topic by clicking on the Printer-friendly version link at the bottom of the page. A new window or tab appears displaying the help topic; use your browser's Print command to send the page(s) to your printer.
- You can change the display language for the help by choosing a different language in the page header.
Logging Out
When you are done working in the SLPT platform, you need to log out to end your session.
To log out:
- When logged into the SLPT platform, scroll to the top of a page.
- Place the cursor over your name in the header and select Logout from the drop-down list.
Groups
The Groups menu allows the subscription manager to add, modify and delete groups and respondents, as well as track the testing groups.
In order for a respondent to take a second language proficiency test, they must be part of a group for which a password and a testing schedule have been created. The respondent connects to the TPLS platform using their unique username and the group password.
A single username cannot be added more than once in a group, unless the manager explicitly authorizes the respondent to retake the test (see Results > Individual Respondent Results > Authorize a Respondent to Retake the Test). However, the same username can be added in different groups. Because the database contains a large bank of items, a respondent could take the test more than once without necessarily encountering the same items.
List of Groups
When you access the Management module’s Groups page, all of the subscription’s groups appear in a list.
If there is a large number of elements in the list, you can navigate the pages using the commands on the right of the page, above and below the list: |
To consult the list of groups:
- ID: System-generated identification number
- Group: The name assigned to the group when it was created
- Start: The date at which the group can begin taking the test
- End: The latest date at which the group can take the test
- Registered: The number of respondents registered in the group
- In progress: The number of respondents currently taking the test
- Completed: The number of respondents who completed the test
- Status: The status of the test, Active or Blocked
Add or Modify a Group
The Group page contains the general test settings for the selected group. This is also where the manager assigns respondents to the selected group's test.
To add a group:
- Click Groups from the left-side menu; the Groups window appears.
- Click Add a group; the Group window appears.
In the General Settings section, add all obligatory information marked with a red asterisk.
To modify a group:
- From the main Groups page, click a Group name from the Groups page.
- In the General Settings area, select a new Status for the group if required: Active or Blocked.
- In the Group name field, type a new name for the group if required.
- In the Password field, type a new password for the group. You can select the Show the password check box to make the password visible.
IMPORTANT: If you change the password, make sure you inform the group’s respondents who need the new password to take the test. - If required, select a new date and time when respondents will be able to begin taking the test using the Test start drop-down lists.
- If required, select a new date and time when respondents will no longer be able to take the test using the Test End drop-down lists.
- Click Save. A banner message appears, indicating that the group was successfully saved.
To add respondents to this group:
Consult the List of Respondents page.
General Settings
On the Group page, the manager sets the parameters for each group and adds respondents.
- In the General Settings area, select a Status for the group: Active or Blocked. The default setting is Active. A blocked group is unable to administer a test.
- In the Group name field, type a representative name for the group (for example, New Students Fall 2014).
- In the Password field, type a password for the group. You can select the Show the password check box to make the password visible. Passwords are case-sensitive, must be at least 8 characters long, and contain at least one letter and one number.
IMPORTANT: This is the password that the group’s respondents will have to enter to be able to take the test. They cannot take the test without providing a unique username combined with a unique group password. - From the Test start drop-down lists, select the date and time when respondents will be able to begin taking the test. This is the earliest possible date that the group’s respondents can take the test. The default value is for the current day.
- From the Test End drop-down lists, select the date and time when respondents will no longer be able to take the test. This is the date at which the group’s status will automatically be set to Blocked. The default value is for the next day.
- Click Save. A banner message appears, indicating that the group was successfully saved.
List of Respondents
Below the General Settings area on the Group page, the List of respondents who did not start the test lists all respondents who are eligible to take the test for that group. It is here that the manager can add and delete respondents.
Each respondent within the same group must have a unique username assigned by the manager; this could be a permanent code, a generic code, the respondent's email address or name, or any other appropriate value chosen by the manager. In order to follow a respondent's results in more than one group, the manager should ensure that the same username is used by the respondent in each of the different groups.
- From the Group page, in the List of respondents who did not start the test area, click Add respondents; the Add respondents window appears.
There are three ways you can add respondents to a group:
- Using a CSV File, where the manager uploads a Comma Separated Value (CSV), .xls or .xlsx file with all the respondent usernames to the TPLS server.
- Using Copy/Paste, where the manager adds respondent usernames manually, by copying a list of usernames from a text file and pasting them into the Add respondents window.
- Individually, where the manager adds respondent usernames manually, one at a time.
IMPORTANT: All respondent usernames must be separated with a carriage return, whether entered manually or using a CSV file.
![]() For assistance when entering respondent usernames, click the question mark icon for additional details.
For assistance when entering respondent usernames, click the question mark icon for additional details.
To add respondents using a CSV (or .xls or .xlsx) file
NOTE: For this procedure you must have a CSV, .xls or .xlsx file with a previously saved list of respondent usernames, each one on its own line of the file in the first column, without a header.
- In the Add respondents window above the text field, click Choose File, the Open file browser window appears.
- Browse to the location where you saved the CSV, .xls or .xlsx file and select it. The list of respondent usernames are automatically loaded into the Add respondents window.
- Click Add usernames to the Respondents List. A banner message appears, indicating that the respondent(s) was (were) successfully added.
To add respondents using copy/paste:
NOTE: For this procedure you must have a text file with a previously saved list of respondent usernames, each one on its own line of the file.
- Open your plain text file with the list of respondent usernames and select all the usernames.
- Copy the selected text.
- In the Add respondents window, click in the text field and paste the text copied from the file. The copied respondent usernames appear in the text field.
- Click Add usernames to the Respondents List. A banner message appears, indicating that the respondent(s) was (were) successfully added
To add respondents individually:
- In the text field, type the username for a respondent.
- Repeat step 3 for each additional respondent you want to add.
- Click Add usernames to the Respondents List, separating each entry by a carriage return. A banner message appears, indicating that the respondent(s) was (were) successfully added.
To remove respondents from a group:
- From the Group page, in the List of respondents who did not start the test, scroll through the list to find the respondent username(s) to delete and select its (their) check box(es).
- Click Delete.
- Click OK to confirm that you want to delete the selected respondent username(s). The selected username(s) is (are) removed from the List of respondents who did not start the test.
Inviting Respondents to Take the Test
Once the manager has created the group or groups that will take the test, a list of respondents should be forwarded to the department responsible for the test within the institution, so that the institution may inform respondents that they can take the test.
The message sent to each respondent by the institution should include some or all of the following information:
- The unique username assigned to the respondent.
- The correct web address for the test:
- TPLS-English http://www.tpls.ca/test Note that this test measures proficiency in English.
- TPLS-Français http://www.tpls.ca/passation Note that this test measures proficiency in French.
- The dates and times during which the respondent can access the test.
- The testing location (if the respondent is obliged to take the test in a supervised environment).
- The approximate duration of the test.
- The importance of verifying the audio before starting the test.
- The importance of answering all the questions honestly.
- Whether or not results will be provided to the respondent at the end of the test and how/where the respondent may access these results.
- The contact information for the test manager at the respondent's institution.
- The web address for the Student Guide: http://aide.ccdmd.qc.ca/tpls/passation/ that the respondent should consult before taking the test.
NOTE: It is highly recommended that respondents be encouraged to read the Student Guide before taking the test, either in a classroom setting or on their own time. The link to the Student Guide is displayed when the respondent connects to the TPLS and on the Instructions page, but once the test begins, it is no longer accessible.
Delete a Group
The manager can delete groups from their subscription. When you delete a group, all the respondent data in the group is deleted, including the results of those who have started or finished the test and the usernames of respondents who have not yet started the test.
To delete one or more groups:
- From the main Groups page, select the check box for the group(s) you want to delete.
- Click Delete. A popup window appears asking you to confirm that you want to delete the selected group(s).
- Click OK. The group(s) is/are deleted.
Disable the Test for a Group
The manager is the only person who can disable the test for a specific group.
To disable the test for a group:
- From the main Groups page, click on the group(s) you want to disable; the Group window appears.
- In the General Settings area, select the Blocked option as the group Status.
- Click Save. A banner message appears, indicating that the group was successfully updated.
IMPORTANT: The group will not be able to take the test until the Status is returned to Active.
Results
The Results menu allows the manager to track respondents who have begun or completed the test and to export, print, or delete results.
You can also consult the detailed results for individual respondents and authorize a respondent to retake the test.
List of Respondent Results
When you access the Management module’s Results page, the List of respondents who started the test appears, indicating which respondents in the selected group have started or completed the test, along with their results. To display the results of a specific group, select the group name from the Group list.
If there is a large number of elements in the list, you can navigate the pages using the commands on the right of the page, above and below the list: |
To consult the list of respondents who started the test:
- Username: Respondent username as assigned by the manager when the respondent's group was created
- Last Name, First Name: Last and first names entered by the respondent on the home page of the test
- Start: The date and time at which the respondent started their test
- End: The date and time at which the respondent completed the test
- Proficiency level: Proficiency level from 1 to 10+ as calculated by the adaptive test for all categories combined.
- Suggested course: The suggested course level, based on the proficiency level of the respondent (if the manager has entered this information in the Management module's Settings)
Individual Respondent Results
On the Results page, you can consult the detailed results for each respondent, including the global result, results by category and results for each of the items presented to the respondent during the test.
To view an individual respondent’s results:
- From the Group list, select the group to which the respondent belongs.
- Click the respondent's Username in the List of respondents who started the test; the Respondent’s results page appears, including the respondent's demographic information, followed by results and a list of items presented during the test.
The demographic information includes:
- Username: Respondent identification number as assigned by the manager when the respondent's group was created
- Group: The respondent's testing group
Information entered by the respondent on the SLPT home page
- Last Name, First Name
- Sex
- Language spoken at home
- Self-assessment of the proficiency level in English
System-generated information
- Test start: The date and time the respondent started the test
- Test end: The date when the test was completed
Respondent results
- Global proficiency level: The global proficiency level ranging from 1 to 10+ as calculated by the adaptive test for all categories combined.
- Proficiency level for each of the test categories: Each category's proficiency level ranging from 1 to 10+ as calculated by the adaptive test.
- Suggested course: Optional data associated with each of the proficiency levels by the manager in the Management module's Settings menu.
List of items presented to the respondent :
- #: The number representing the order in which the items were presented to the respondent
- ID: System-generated item identification number
- Category: The item's assigned category
- Answer: The respondent's result for the question; 0=incorrect answer, 1=correct answer
- Time to answer (s): The time, measured in seconds, that the respondent took to answer the question
Authorize a Respondent to Retake the Test
If a respondent cannot complete the test due to a technical problem or an interrupted Internet connection, the manager can advise the respondent to return to the home page of the test and enter the same combination of username + group password to continue the test where it was interrupted.
Whether there has been a technical problem or not, the manager may for various reasons wish to cancel the sessions of certain respondents and allow them to retake the test.
To authorize a respondent to retake a test:
- From the Group list, select the group whose respondent you want to authorize to retake the test.
- A summary of results for the group’s respondents appears in the List of respondents who started the test.
- Click the username of the respondent you want to authorize to retake the test; the Respondent’s results page appears.
- Click Authorize the respondent to retake the test.
NOTE: This deletes the results of the previous test and returns the respondent to the List of respondents who did not start the test. - Click OK to confirm that you are authorizing the respondent to retake the test.
When authorization is granted, the respondent can immediately connect to the test home page and enter the same username and group password to retake the test. There is no fee for a test that is retaken.
Print Results
The manager can print results for a single respondent or for multiple respondents in a group.
To print one or more respondent’s results:
- Click the Results menu on the left side of the Management module; the Results page appears.
- From the Group list, select the group whose individual respondent results you want to print.
- A summary of results for the group’s respondents appears in the List of respondents who started the test.
- Select the check box for the respondent usernames whose results you want to print.
- Click Print.
- A new window/tab appears displaying the detailed results of the selected respondents. Use your browser’s Print command to send the page(s) to your printer.
You can also print an individual respondent's results from the Respondent's results page:
- Click the Results menu on the left side of the Management module; the Results page appears.
- From the Group list, select the group whose individual respondent results you want to print.
- A summary of results for the group’s respondents appears in the List of respondents who started the test.
- Click the respondent username whose results you want to print; the Respondent’s results page appears.
- Click Print.
- A new window/tab appears displaying the detailed results for the selected respondent. Use your browser’s Print command to send the page(s) to your printer.
Delete Results
The manager can delete individual results after respondents have started their test.
To delete respondent results:
- Click the Results menu on the left side of the Management module; the Results page appears.
- From the Group list, select the group whose individual respondent results you want to delete.
- A summary of results for the group’s respondents appears in the List of respondents who started the test.
- Select the check box for the respondent username(s) whose results you want to delete.
- Click Delete.
- Click OK to confirm that you want to delete the selected result(s). The results for these respondants in the group are deleted.
NOTE: When you delete respondents' results using the Delete command, the tests are still invoiced.
Delete results by authorizing a respondant to retake the test:
When you authorize a respondent to retake the test, the results of the first test are deleted. In this case, the second test for the respondent isn't invoiced.
Export the Data
The manager can export test results for individual respondents, a select group of respondents, or all respondents in a selected group. Results are exported to a Comma Separated Value (CSV) file for analysis or transfer to an administrative platform.
NOTE: The manager can configure the CSV export template, which determines which fields are included when exporting the test data. Use the Settings menu to Configure the CSV Export Template.
To export one or more respondent results:
- Click the Results menu on the left side of the Management module; the Results page appears.
- From the Group list, select the group whose individual respondent results you want to export.
- A summary of results for the group’s respondents appears in the List of respondents who started the test list.
- Select the check box for the respondent username(s) whose results you want to export.
- Click Export the results in CSV format.
- The CSV file is downloaded to your computer, containing the results for the selected respondent(s).
To export the results of all respondents in a group:
- Click the Results menu on the left side of the Management module; the Results page appears.
- From the Group list, select the group whose individual respondent results you want to export.
- A summary of results for the group’s respondents appears in the List of respondents who started the test list.
- Click Export all in CSV format at the top of the page.
- The CSV file is downloaded to your computer, containing the results for all of the respondents in the group who have started the test.
Invoicing
In the Invoicing page, the manager can:
View the contact information for the person responsible for receiving and treating invoices at their institution. If the information is incorrect, the manager can either contact the CCDMD or correct the information in the Manager Profile or Institution sections via the Subscription menu.
Consult the List of non-invoiced respondents that includes the following information:
- Respondent system ID #
- Respondent username
- Respondent's Group
- Start of testing period
- End of testing period
Consult the Invoicing History that includes the following information:
- Invoice Number
- Date invoice issued
- Subscription manager for invoice
- Number of respondents invoiced
- Cost per test
- Total invoice amount
Print one or more invoices :
- From the Invoicing History list, select the check box for the invoice(s) you want to print.
- Click Print.
- A new window/tab appears displaying invoicing details and the List of invoiced respondents for the selected invoice(s). Use your browser’s Print command to send the page(s) to your printer.
Subscription
The Subscription menu contains the general settings for the subscription, as well as the contact information for the subscription manager and the institution the manager represents. The administrator can modify all of the subscription information in the Administration module.
To consult or modify a subscription, click Subscription in the left-side menu; the Subscription page appears with the following information. Obligatory information is marked with a red asterisk:
General Settings
Only the TPLS administrator at the CCDMD can add or modify the General Settings. The information is available for consultation purposes on the Subscription page in the Management module of each subscriber. If you require changes, contact the CCDMD.
- Subscription Start date: The date at which the subscriber can begin administering tests.
- Subscription End date: The date at which the subscriber will no longer be able to administer tests.
NOTE : If the manager attempts to access the Management module at a time that is not included in the subscription, a message to contact the CCDMD will appear. If a respondent attempts to access the test at a time that is not included in the subscription, a message prepared by the manager in the General Settings of the Management module will appear. - Cost per respondent ($): The billing cost for each test per respondent, set by the CCDMD and reviewed periodically.
Manager Profile
The TPLS administrator at the CCDMD creates the subscription Manager Profile to facilitate invoicing. The profile can be modified by the manager on the Subscription page of the Management module.
- In the Username field, change the Manager's username if needed. Changing this field affects your login to the Management module. Make sure that you take note of the new username; you will need it when you log in the next time.
- If required, change the First Name, Last Name, or Email address in the appropriate fields.
- If you want to change the password, type the new password in the Password field. Changing this field affects your login to the Management module. Make sure that you take note of the new password; you will need it when you log in the next time.
NOTE: Passwords are case-sensitive , must be at least 8 characters long, and contain at least one letter and one number. - Re-type the new password in the Confirm the password field.
- You can also enter the optional title, telephone, and language information in the appropriate fields.The Language field determines the default language of the platform interface when you log in. You can change it at any time.
- Click Save.
Institution
The TPLS administrator at the CCDMD adds the Institution information. Some of this information can be modified by the manager on the Subscription page of the Management module, with the exception of the institution name and service.
- The Institution Name is the name entered by the administrator that serves primarily for invoicing.
- The Department is the department entered by the administrator.
- If required, change the institution’s Address information by editing the necessary fields (No., Street, City, Postal Code, Country, Province / State / Department).
- Click Save.
Settings
The Settings menu allows the manager to suggest course numbers for each proficiency level, customize messages to include in the test and determine the parameters for results reports.
NOTE: Suggesting course numbers is optional and may be undertaken by the manager only if the subscribing institution wishes to use the TPLS as a placement test.
The Settings page contains three areas:
- Placement test customization
- Messages customization
- Template for Respondents' Results Export
Placement test customization
On the Settings page, the Placement test customization section includes the Global Proficiency Level established by the TPLS administrator at the CCDMD. These values cannot be edited, however the Suggested course levels can be adjusted by the manager, so that respondents are automatically assigned to appropriate language classes.
- For more information on how to select the suggested courses, consult the Proficiency Levels Descriptions in the For More Information section of the Help Guide for a summary of what students are able to do at each of the proficiency levels.
- For each of the rows, enter a course number into the final column under Suggested course. The same course number may be associated with multiple proficiency levels. Once defined, these values are displayed in the Results page, the Respondents's results, and the exported CSV format results if you added this field to your template.
- Click Save.
NOTE: The manager can, in the Messages customization section, decide whether or not to display the proficiency level and suggested course to the respondent on the end page of the test.
Messages customization
On the Settings page in the Messages customization section, the manager can customize test messages when tests are inactive and for when the respondent has completed the test.
When you first access the Management module, a default message such as the following (in English or French) appears as a placeholder in the Message for inactive test field (with the variables %nom_name and %courriel_email being replaced by the information saved in the Subscription menu):
This test is currently inactive. If necessary, please contact your institution's test manager:
Test manager's name: %nom_name
Email: %courriel_email
To customize the message for an inactive test:
- Scroll to the Messages customization section on the Settings page.
- In the Message for inactive test field, type the message that will appear if a respondent is presented with a test that has been marked as inactive.
- Replace %nom_name with your name.
- Replace %courriel_email with your email address.
- Click Save.
To customize the message displayed at the end of a test:
- Scroll to the Messages customization section on the Settings page.
- In the Text displayed on the test’s end page field, type the message that will appear when a respondent has completed their test.
- Select a Display respondent proficiency level option: Yes, to display the proficiency level results of the respondent’s test, or No to keep the results hidden from the respondent. The default setting is Yes.
NOTE: You must fill out the last column of the Placement test customization section in the Settings page if you wish to also display the Suggested course to the respondent. - Click Save.
Template for Respondents' Results Export
On the Settings page in the Template for Respondents’ Results Export section, the manager can determine specific fields and their order when exporting test results to a Comma Separated Value (CSV) file. The selected CSV format will apply to all groups in the subscription.
The default Template for Respondents’ Results Export includes two columns: respondent Username and Result (all categories). The template can be modified by selecting various types of data collected during testing and placing the data in a preferred order:
- Username
- Result
- Group
- Last Name
- First Name
- Sex
- Language
- Self-assessment
- Start
- End
- Proficiency level (all categories)
- Proficiency level (each separate category)
- Suggested course
To customize the template for exporting to CSV:
- On the Settings page, scroll to the Template for Respondents’ Results Export section.
- Select an entry from the Available columns list and click the right arrow; the entry appears at the bottom of the Selected columns list.
NOTE: To select more than one element, hold down the CTRL key on a PC or the cmd key on a Mac. - To change the order of items in the Selected columns list, select an item and click the up or down arrows to move the item up or down in the list.
- To remove an item from the Selected columns list, select an item and click the left arrow.
- Click Save.
For More Information
The Second Language Proficiency Test (TPLS) is an educational resource created by the Collegial Centre for Educational Materials Development (CCDMD) for the Québec college network.
The CCDMD’s mandate is to ensure that students throughout the network have access to quality educational materials in both French and English, and to contribute to the development of such materials at the different stages of production. The CCDMD produces materials for students in a wide range of courses and programs as well as documents intended specially to help them improve their French and English language skills.
These services are funded by the Québec Ministère de l'Éducation et de l'Enseignement supérieur (MEES) and, in some cases, benefit from support under the Canada-Québec Agreement on Minority-language Education and Second Language Instruction.
Colleges wishing to use this test must have a subscription. Anyone wishing to use it for commercial purposes must enter into a specific agreement with the CCDMD. To become a subscriber or to obtain more information, please contact the CCDMD by email at tpls@ccdmd.qc.ca or by telephone at (514 873-2200).
Background
In the fall of 2012, the Collegial Centre for Educational Materials Development (CCDMD) was entrusted with a new mandate to develop a second language proficiency test. The CCDMD set up a production team (project managers, content specialists, programmers and technicians) after having consulted some twenty professionals and experts in the college and university networks. When the technical analysis was concluded, the CCDMD proposed an adaptive test model and a linguistic scale based on new criteria.
Educational Objectives
The primary objective of the Second Language Proficiency Test (TPLS) is to determine the proficiency level of the respondent in order to propose appropriate courses as well as tailored learning activities within those courses.
At the end of the test, the result is given as a number from 1 to 10 corresponding to a level on the linguistic scale.
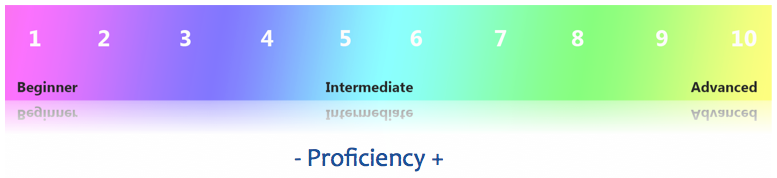
The teacher and student can then consult the proficiency level descriptions for information on what the student is able to do at that level. The teacher can also use this information to plan learning activities to help the student progress to the next level. As a result, the TPLS goes further than a traditional placement test, such as the eTCALS, which is designed strictly to assign a student to a course level according to his or her results. Note, however, that a test manager in a subscribing college has the option in the management module to associate a course number with each of the 10 levels.
The proficiency of students taking an upgrading (mise à niveau) course is at the lower levels of the scale. A level 10 result means that the student may be more proficient than the maximum level measured by the test. Ideally, college graduates should reach level 8: subsequent university training should enable students to fine-tune their proficiency and achieve level 9 or higher during their university studies.
Features
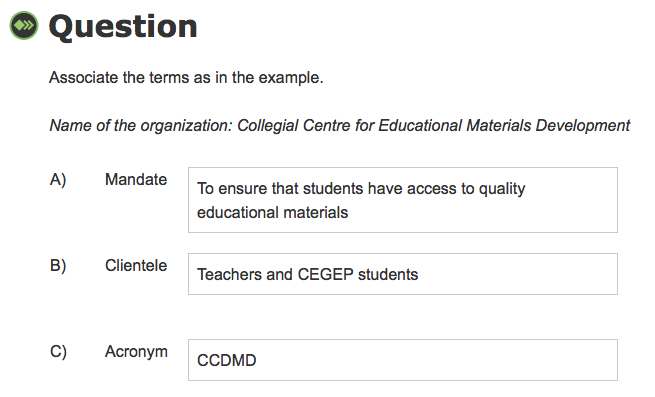
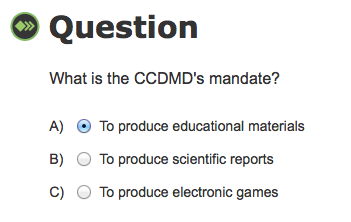
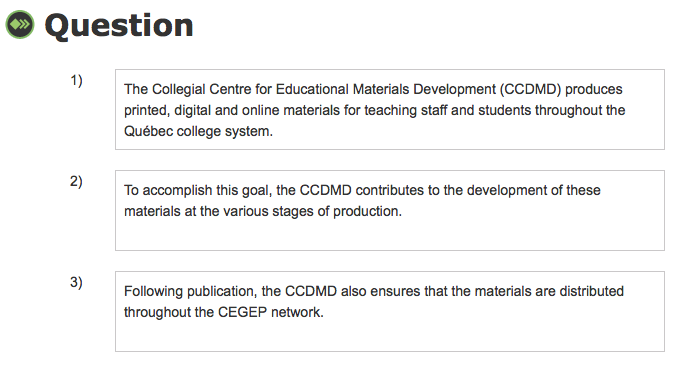
The TPLS is made up of two categories of items: written comprehension and oral comprehension. There are five types of items: associations, multiple choice, sequencing, cloze text with drag and drop, and cloze text with menus. Each item includes:
- general instructions, provided in words and images;
- a text (written comprehension) or audio recording (oral comprehension);
- a question;
- a choice of answers.
The TPLS is an adaptive test, which is non-linear: each correct or incorrect answer affects the progression of the test. The test gradually estimates the provisional skill level of the respondent (θ value) and dynamically selects the next item most likely to assess the respondent’s actual skill level. The test continues until the estimated skill level becomes stable, and the final θ value is translated into a proficiency level on the language scale that is the reference for the measurement system.
An adaptive test, in comparison with a non-adaptive test, makes it possible to reduce the number of items presented and decrease the test administration time, which can increase the reliability of skill assessment.
Sample Item Types
There are five item types:
- Associations
Drag and drop the answer choices to form pairs. - Multiple choice
Select the correct answer from a list of possible answers. - Sequencing
Drag and drop the answer choices in the correct order to form a logical text. - Cloze text with drag-and-drop
Drag and drop the correct answers into the blank spaces. - Cloze text with menus
Select the correct answer from a list of possible answers.
The answers to the following questions can be found in this text:

ASSOCIATIONS: Drag and drop the answer choices to form pairs.
Respond to an association question by pairing each of a set of elements in the 2nd column with one of the choices provided in the 1st column. Association questions are used to assess recognition and recall of related information. The response is deemed correct when the respondent has successfully matched all of the elements.
MULTIPLE CHOICE: Select the correct answer from a list of possible answers.
Respond to a multiple choice question by selecting the correct answer from a list that includes the correct answer and several incorrect answers. Multiple choice questions are used to test comprehension of a broad range of content. The context of the item and the type of response required determines whether the item is recall or interpretation. The response is deemed correct when the respondent has selected the single correct answer.
SEQUENCING: Drag and drop the answer choices in the correct order to form a logical text.
Respond to a sequencing question by dragging the elements into the correct order. Sequencing questions are used to test the ability to recall a series of events or a process in the order in which it was presented. They measure the ability to construct meaning and comprehend logical consequences expressed in verbal or written form. The response is deemed correct when the respondent has arranged all of the elements in the correct order.
CLOZE TEXT: Drag and drop the correct answers into the blank spaces.
Respond to a cloze text with drag-and-drop question by filling in the blanks in a text. Drag the correct answer from a predefined set of possible answers above the text to the appropriate blank in the text. Cloze text with drag-and-drop questions are used to assess language skills by imitating the editing process. They measure the ability to infer the most appropriate conclusion to an incomplete statement. The response is deemed correct when the respondent has filled in all of the blanks correctly.
CLOZE TEXT: Select the correct answer from a list of possible answers.
Respond to a cloze text with menus question by filling in the blanks in a text. Select the correct answer from a predefined list of possible answers. Cloze text with menus questions are used to assess the ability to compare options and make accurate choices. Cloze text with menus questions are simpler to decode than cloze text with drag-and-drop, as they narrow the range of correct answers. The response is deemed correct when the respondent has selected the single correct answer.

Accessibility
The written instructions for each item, intended to guide the respondent in his or her approach, are accompanied by visual instructions. As a result, a respondent who is not sufficiently proficient to read the written instructions should be able to understand the task and answer the question. Visual instructions are provided for all items, including those in the advanced levels. This strategy creates a predictable virtual environment suitable for various learning styles.
Images have also been included with the text or audio recording in the majority of items in proficiency levels 1 to 3. In some cases, the answer choices consist of numbers, images or even colours.
Visual instructions that accompany the written instructions

- You will have 15 seconds to read the instructions, the question and the answer choices.
- After the tone, you will hear a dialogue.
- Answer the question.
Accommodation for students with special needs
Since the objective of the TPLS is to determine reading and listening proficiency, no writing support measure (screen reader) or oral support measure (audio transcription) has been provided for in the test. The allotted answer time for each item is regulated by the administrator.
The test is an objective measure of second language proficiency throughout the college network. We therefore request that educational institutions do not adapt it, as we wish to avoid distortion of the data collected.
The CCDMD production team would be pleased to discuss the development of an untimed replacement test, hosted on a separate virtual environment, to meet the needs of colleges wishing to accommodate groups of students with special needs.
The CCDMD can be reached at 514 873-2200 or info@ccdmd.qc.ca.
Administering the Test
The TPLS is intended to be administered twice during a student’s college studies: once at the beginning and once before the diploma is awarded. The test manager of a subscribing college may, however, decide to use it differently. The test can be used as a placement test under certain conditions, as a test within a language course to determine group level or as a measure of the student's level compared to an expected level for certain professional careers. However, since students do not progress rapidly to a higher level of proficiency, it is not recommended they take the test repeatedly during their studies.
The management module provides an institution's test manager with all of the necessary features to manage a subscription. From this module, the manager can create groups, register respondents and define the testing schedule. The manager has access to both the overall results and detailed data. The manager can also configure the test as needed - for example, by associating linguistic scale levels with specific course numbers, reformulating certain messages, choosing whether or not to display results at the end of the test and defining the export format for results to a spreadsheet, for statistical analysis or to the institution's educational platform.
The test can be taken online from home, in class or in a lab. Students can access the test using an ID and a password sent by the test manager. The monitoring of tests administered in class or in a lab is facilitated by the fact that the test progression (the type and order of items) varies with the respondent. Similarly, the correct answer is not always in the same order in the list of answer choices.
Scale of Proficiency Levels
The scale used for the TPLS was developed on the basis of a comparison with three recognized scales in Québec: the Échelle québécoise des niveaux de compétence en français des personnes immigrantes adultes, and the two scales produced at the request of the Ministère de l’Éducation, du Loisir et du Sport: the Quebec College ESL Benchmarks (provisional version), and the Échelle des niveaux de compétence en français langue seconde pour le collégial (provisional version).
These reference scales include 12 levels. For the proficiency test project, only the first 10 levels were taken into account, in order to comply with the reality of most CEGEP students. Also, only skills related to comprehension (oral and written) were included. The results of the comprehension test serve to guide decisions regarding the placement of candidates in the various courses offered. In the development of the linguistic scale, the design team first selected indicators whose content was common to that of at least two scales and that demonstrated potential for operationalization in an adaptive test. The team subsequently chose other indicators that were consistent with and complementary to the ones initially selected. It later added descriptions to the scale from the Canadian Language Benchmarks (CLB).
Importance of a Scale of Proficiency Levels
The interpretation of a proficiency level result based on a scale offers a number of advantages:
- The information obtained is standardized and can thus be compared with that derived from other tests and scales developed according to the same principles;
- The proficiency levels in the scale provide clear, practical information that can be used to analyze programs and develop their content with a view to standardizing second language services at the college level;
- These proficiency levels offer clear, practical information that can be used to formulate the learning objectives to be achieved: students can take the test at the beginning and end of their studies to measure their progression;
- Proficiency test results can be used by students in certain programs to evaluate their proficiency in preparation for language exams administered by the Office québécois de la langue française.
Proficiency Level Descriptions
The Scale of Second Language Proficiency Levels for the College Student describes the development of second language proficiency in 10 levels. For each level, it defines what the learner is able to understand orally and in writing.
The proficiency test is made up of a number of items divided into two categories:
- Items that focus on audio recordings and measure the respondent’s degree of proficiency in oral comprehension;
- Items that focus on texts and measure the respondent’s degree of proficiency in written comprehension.
Oral Comprehension
The items measuring oral comprehension are based on audio recordings, which vary in length and complexity depending on the target proficiency level. The audio recordings serve as the foundation for the questions appearing in one or more items.
Each item in oral comprehension includes:
- General instructions, given in words and images, which specify what the respondent must do, i.e., read the question and the choice of answers BEFORE listening to the recording;
- The audio recording, which starts automatically after a 15-second pause and plays only once. The volume can be adjusted with the slider bar on the screen. The recording can vary in form (audio message, dialogue, discussion, etc.) and provides the basis for the item question; some recordings are accompanied by an image illustrating the context.
- The question;
- The choice of answers;
- The Continue button to go to the next item.
LEVELS 1-2 OC
Level 1
Conditions: In predictable situations, students understand a few isolated words and expressions with the support of the speaker.
More specifically, they can:
- understand information related to times, dates, telephone numbers, addresses;
- understand information related to the days of the week and months of the year;
- identify the parts of the body.
Level 2
Conditions: In predictable situations, students understand simple sentences and short conversations with the support of the speaker.
More specifically, they can:
- understand information related to colours;
- understand information and requests;
- understand information related to an institution;
- follow directions to find their way around an institution;
- understand information related to height, weight and age.
LEVELS 3-4 OC
Level 3
Conditions: In predictable situations, students understand the gist of a simple conversation or message.
More specifically, they can:
- understand information related to measurements;
- understand information related to a housing or domestic problem;
- understand information related to leisure or recreation;
- understand the main idea in an advertisement.
Level 4
Conditions: In predictable situations, students understand the meaning of a simple conversation or message. The topic is familiar, the speech is clear, and the ideas are presented in a direct manner in everyday language.
More specifically, they can:
- understand the main ideas in a presentation;
- understand information related to who?, what?, when?, where? questions;
- understand a telephone message;
- understand a sequence of events based on time markers;
- grasp the intention of a message;
- situate events by identifying time and frequency indicators.
LEVELS 5-6 OC
Level 5
Conditions: In predictable situations, students understand the progression of ideas. The topic is concrete and familiar, the speech is clear, and the ideas are expressed succinctly in everyday language.
More specifically, they can:
- follow a conversation;
- understand key points in a presentation;
- grasp the main ideas in a television or radio show;
- understand the relationship between speakers;
- understand the main ideas in a conversation;
- understand the intention of communication.
Level 6
Conditions: In predictable situations or partially predictable situations, students understand conversations and discourse on concrete topics.
More specifically, they can:
- understand primary and secondary ideas;
- distinguish fact from opinion;
- anticipate a conclusion or recommendation;
- grasp the relationship between speakers.
LEVELS 7-8 OC
Level 7
Conditions: In predictable situations or partially predictable situations, students understand conversations or discourse on various concrete topics. The language is standard and speech is at a normal rate.
More specifically, they can:
- follow most conversations with ease;
- follow a conversation on work or recreational activities;
- make inferences about the attitudes and emotions of speakers or about the mood of a conversation;
- understand a variety of common words and popular idiomatic expressions.
Level 8
Conditions: In predictable situations or partially predictable situations, students understand conversations and opinion discourse on various concrete topics.
More specifically, they can:
- follow most conversations in formal and informal contexts;
- understand a structured presentation given the presence of questions and answers; markers (first, etc.); and words related to a presentation or opinion (present, think, believe, etc.);
- distinguish fact from opinion;
- grasp, comparisons, contrasts, and cause and effect relationships.
LEVELS 9-10 OC
Level 9
Conditions: In sometimes unpredictable situations, students understand conversations and discourse on various, sometimes abstract topics.
More specifically, they can:
- understand points (for and against) that will facilitate decision-making;
- distinguish fact from opinion in a discussion or presentation, even when implicit;
- recognize the tone of a conversation or a presentation;
- understand abstract remarks.
Level 10
Conditions: In sometimes unpredictable situations, students easily understand conversations and discourse on various sometimes abstract topics.
More specifically, they can:
- understand criticism or reservations expressed during formal exchanges;
- follow discourse even when speech is at a fast rate;
- infer contradictions;
- deduce the values conveyed by discourse.
Written Comprehension
The items measuring written comprehension are based on written texts, which vary in length and complexity depending on the target proficiency level. The texts serve as the foundation for the questions appearing in one or more items.
Each item in written comprehension includes:
- General instructions, given in words and images, which specify what the respondent must do, i.e., read the question and choice of answers BEFORE reading the text;
- The text, varying in type (invoice, birthday card, film poster, etc.), which provides the basis for the item question;
- The question;
- The choice of answers;
- The Continue button to go to the next item.
LEVELS 1-2 WC
Level 1
Conditions: Documents are very simple, relate to personal identity and refer to immediate needs. Students understand words, expressions or sentences.
More specifically, they can:
- recognize everyday words and known names of people and places;
- recognize common abbreviations;
- identify the months of the year;
- find elements related to personal identification to enter in a form.
Level 2
Conditions: Documents are very simple, relate to personal identity and refer to immediate needs. Students partially understand brief, simple texts.
More specifically, they can:
- find information in various documents;
- recognize numbers written out in full;
- recognize information used in weather forecasts.
LEVELS 3-4 WC
Level 3
Conditions: Documents are very simple or related to advertising and refer to daily life. Students understand the gist of brief, simple texts.
More specifically, they can:
- understand informative documents;
- understand brief descriptions;
- understand information with the help of key words or visual cues;
- identify basic grammar forms.
Level 4
Conditions: Documents relate to concrete topics and refer to daily life. The language is simple and common. Students understand a few paragraphs.
More specifically, they can:
- situate facts, academic events, classroom activities and instructions in time;
- grasp the sequence of steps in directions;
- answer general comprehension questions (who?, what?, when?, where?);
- compare facts in order to make a choice.
LEVELS 5-6 WC
Level 5
Conditions: Documents relate to concrete topics and may include some complex elements, such as certain uncommon words. Students partially understand a few paragraphs.
More specifically, they can:
- identify information in a news article;
- identify information in an informative text;
- demonstrate their understanding by associating information in a text;
- find relevant information in a notice.
Level 6
Conditions: Documents relate to familiar topics and may include some complex elements, such as uncommon words. Students understand the main information in a one-page text.
More specifically, they can:
- identify all the pertinent information in a news article;
- infer the link between paragraphs;
- identify certain cohesion markers in a text;
- demonstrate their comprehension of a text made up of complex sentences that contain common relationship markers.
LEVELS 7-8 WC
Level 7
Conditions: Documents relate to subjects of general interest and may include complex elements, such as uncommon words or certain implicit concepts. Students understand the main idea in a text.
More specifically, they can:
- identify the main idea and secondary ideas;
- differentiate fact from opinion.
Level 8
Conditions: Documents relate to subjects of general interest and include arguments. Texts may relate to a specific field of study. They include complex elements, such as uncommon words, implicit concepts and abstract ideas. Students understand the main idea in documents of several pages.
More specifically, they can:
- identify the main idea;
- recognize different points of view;
- understand an article related to their field of study;
- understand a literary text.
LEVELS 9-10 WC
Level 9
Conditions: Documents include various complex elements, and may address unfamiliar or abstract topics. Students understand the main idea in complex documents.
More specifically, they can:
- recount the author’s arguments;
- recognize the function of linking words in a text;
- identify the main idea and pinpoint some details.
Level 10
Conditions: Documents include various complex elements, and address abstract topics. Students understand the main idea, the tone and explanations in complex documents.
More specifically, they can:
- recognize adjectives, adverbs and other words that convey tone;
- recognize subtext;
- recognize the links of cause, intention, time and consequence, expressed by the most common subordinating words.
Production Team
Application Design
Research, Educational Design and Drafting
Project Management
Test Evaluation
Translation
Drafting of Online Help Guide
Language Editing
|
System Design and Programming
Web Integration
Graphic Design
Audio Production
Voice
|
AcknowledgmentsDeborah Armstrong, Rebecca Baker, Chantal Bélanger, Kathye Bélanger, Philippe Bonneau, Marie-Pierre Bouchard, Yvonne Christiansen, Marie-Claude Doucet, Cathie Dugas, Paul Fournier, Philippe Gagné, Sylvain Gagnon, Francine Gervais, Sue Harrison, Réjean Jobin, André Laferrière, Charles Lapointe, James Laviolette, Julia Lovatt, Michel D. Laurier, Susan MacNeil, Anne McMullon, Jean-Denis Moffet, Andrew Moore, Joanne Munn, Ian Murchison, Colette Noël, Patrick Peachey, Christian Ragusich, Michael Randall, Pierre Richard, Joan Thompson, Rachel Tunnicliffe, Inèse Wilde
This test was designed for the college network in response to current needs, with the objective of promoting academic success for young students in Québec. Many teachers, professionals and students collaborated in the development of the test and its validation. We would like to thank them all for their valued contributions. This project is funded by the Québec Ministère de l'Éducation et de l'Enseignement supérieur (MEES) and the Canada-Québec Agreement on Minority-language Education and Second Language Instruction. |